What is Facebook Pixel?
The Facebook Pixel is one of the powerful tools used for social media advertising and specifically retargeting. Basically, it’s a snippet of code that you place on your website in order to track its visitors and correlate to their Facebook profiles. The data it collects lets you build audiences for your subsequent ads, and retarget people who have already taken specific actions on your website. The fact it allows you to improve your Facebook ad conversion rate and get better ROI is the reason why you should tap into that pixel.
The so-called Retargeting Pixel works using cookies as people interact with the content of the website.
You better install the retargeting pixel now even if you haven’t started advertising yet. It will start collecting data right away so that you will already have something when you’re ready to publish your first Facebook ad.
Facebook tracking pixel is able to track customers across their devices. Thus you see if people tend to see your ads on mobile but switch to a desktop before buying.
How to create Facebook Pixel?
Each Facebook pixel has its own unique 15 digit ID, which you’ll need to install on every page you want to track on your site. Moreover, you can install a pixel on several websites.
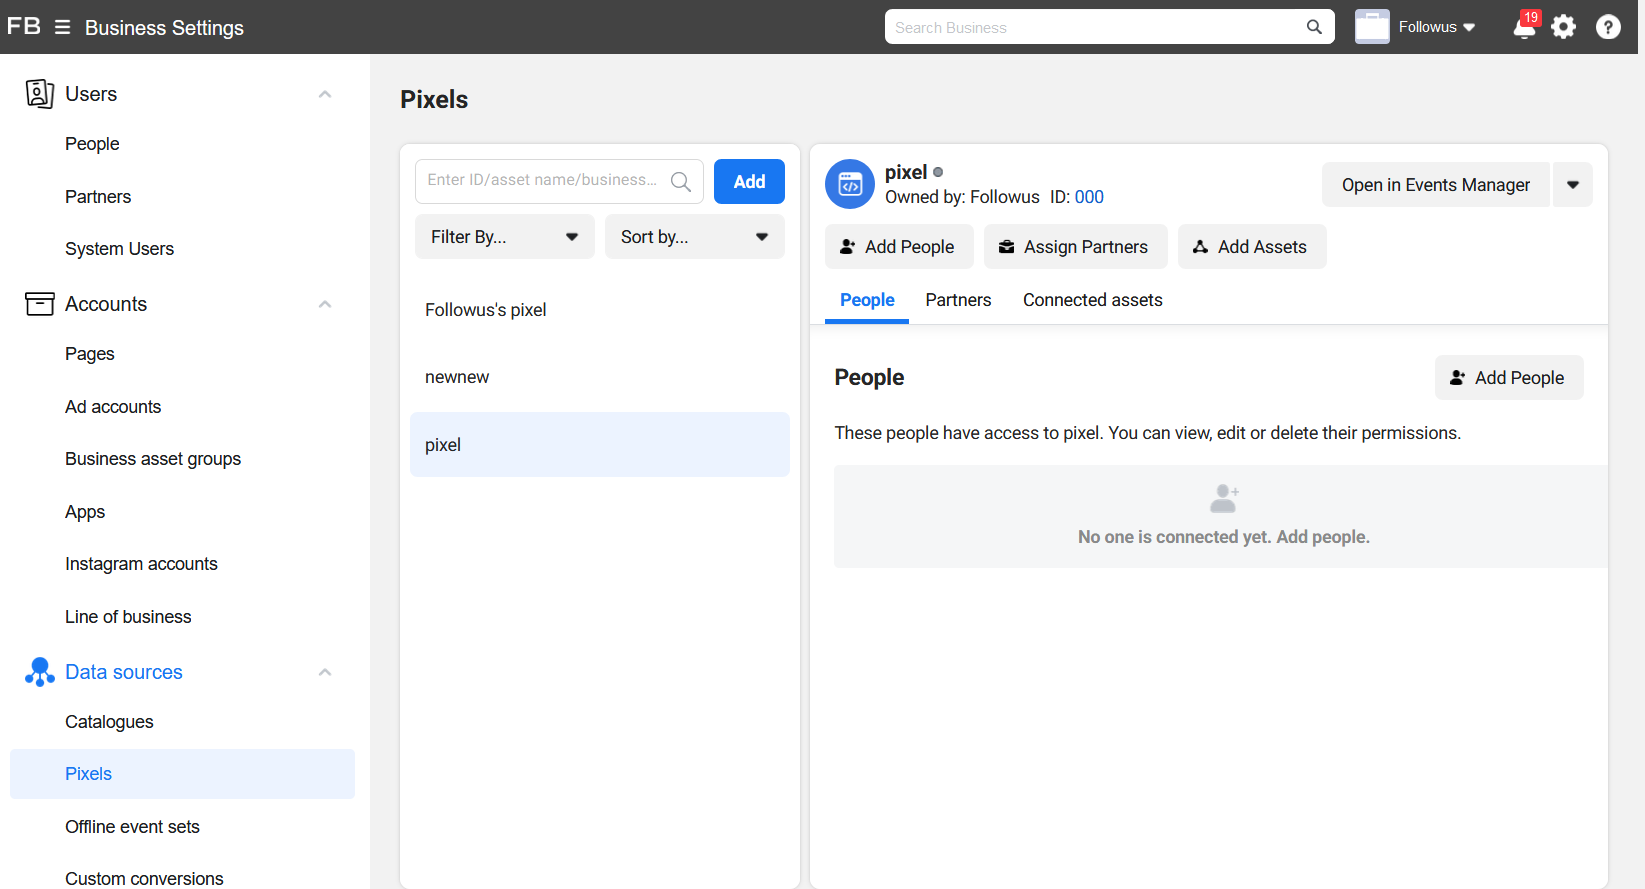
To start creating your Pixel, proceed to the Facebook Ads Manager -> Business Settings. Here find Data sources -> Pixels -> Add. Name the pixel and enter your website URL. Choose to set up the pixel and then click Manually add pixel code to the website. 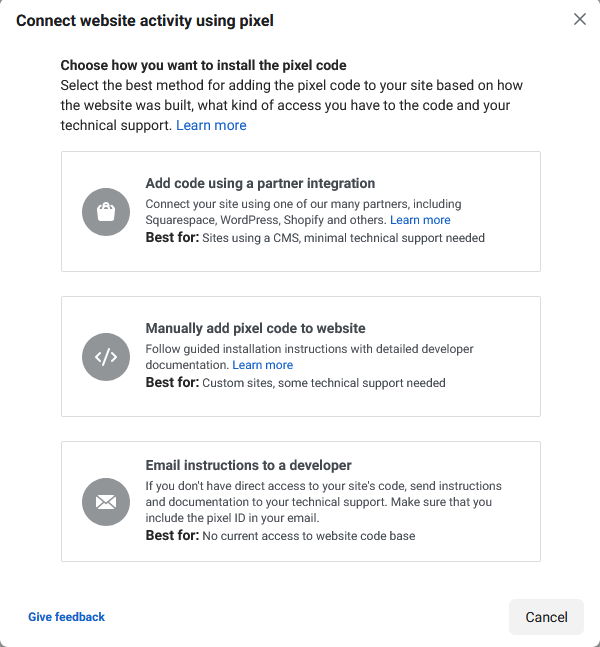
The best place to put the code is in the global header of your website. Paste your Facebook pixel code in the middle of the header code, betweenand. You need to place it into every single page, or into your template if you’re using one.
There is an opportunity to enable automatic advanced matching. This option matches hashed customer data from your website to Facebook profiles. This lets you be more precise tracking conversions and creating larger custom audiences. 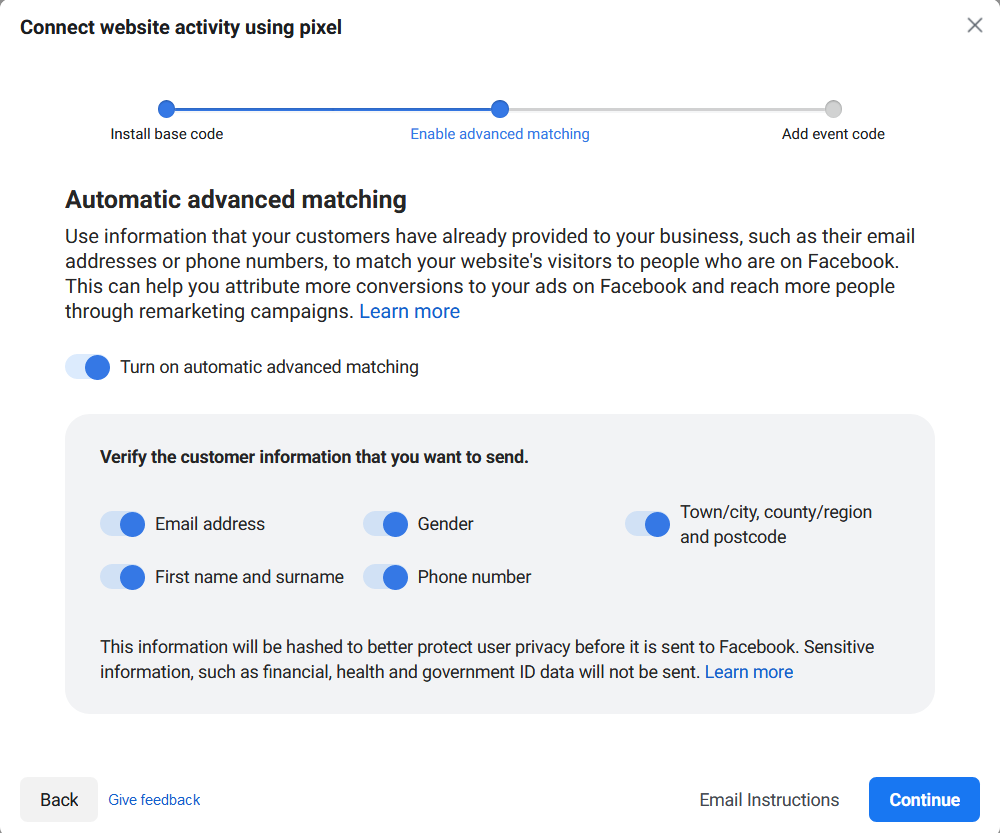
Check whether you’ve installed the code correctly by entering your website URL and clicking Send Test Traffic.
Keep in mind that in order to comply with Facebook’s terms, you have to make sure that your website visitors know you’re collecting their data. You’re supposed to roll out a notice notifying the website visitors of cookies use. You also should explain to them how to keep their personal data from being collected.
There is no way to delete a Pixel created on Facebook, as well as there is no need to create tens of pixels. You can just set one up for all actions you need.
The three ways to track conversions with the pixel.
After you have installed the Pixel, you can choose from three types of events you want to track:
- standard events, which are visitor actions that are predefined and that you report with the help of pixel
- custom events, which are visitor actions that are defined by you and that you report with the help of pixel
- custom conversions, which are visitor actions that are tracked automatically by parsing your website's referrer URLs.
There are 17 standard Facebook pixel events for which you will just copy and paste standard Facebook event code:
- Purchase: Someone completes a purchase on your website.
- Lead: Someone signs up for a trial or otherwise identifies themselves as a lead on your site.
- Complete registration: Someone completes a registration form on your site, such as a subscription form.
- Add payment info: Someone enters their payment information in the purchase process on your website.
- Add to cart: Someone adds a product to their shopping cart on your site.
- Add to wishlist: Someone adds a product to a wishlist on your site.
- Initiate checkout: Someone starts the checkout process to buy something from your site.
- Search: Someone uses the search function to look for something on your site.
- View content: Someone lands on a specific page on your website.
- Contact: Someone contacts your business.
- Customize product: Someone selects a specific version of product, such as choosing a certain color.
- Donate: Someone makes a donation to your cause.
- Find location: Someone searches for your business’s physical location.
- Schedule: Someone books an appointment at your business.
- Start trial: Someone signs up for a free trial of your product.
- Submit application: Someone applies for your product, service, or program, such as a credit card.
- Subscribe: Someone subscribes to a paid product or service.
You can also add more details to standard events using extra bits of code called parameters. These allow you to customize the standard events based on:
- How much a conversion event is worth
- Currency
- Content type, or ID
- Basket contents
Custom events use URL rules based on specific URLS or URL keywords. You can create them in Facebook Events Manager. These are events that you design yourself, allowing you, as it’s said by Facebook, “to define more granular data around events.” This can be scroll depth, button clicks etc. You can use Facebook tracking pixel data to optimize your Facebook ads for specific conversion events on your website. Without a pixel, the only conversion you can optimize for is link clicks. With the pixel, you can optimize for conversions that align more closely with business goals, like purchases and sign-ups.
Use the Pixel data as a base for further retargeting actions. 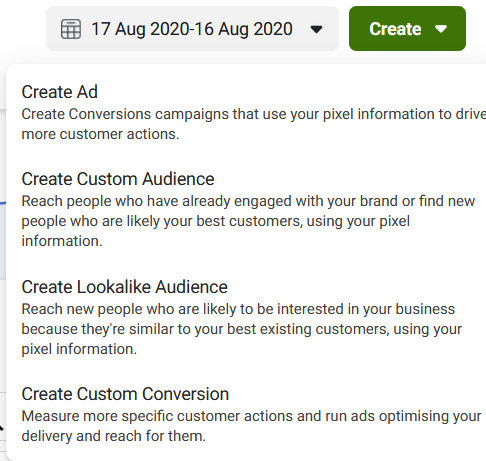
Having installed that pixel, you can start creating custom audiences according to the rules you specify yourself. 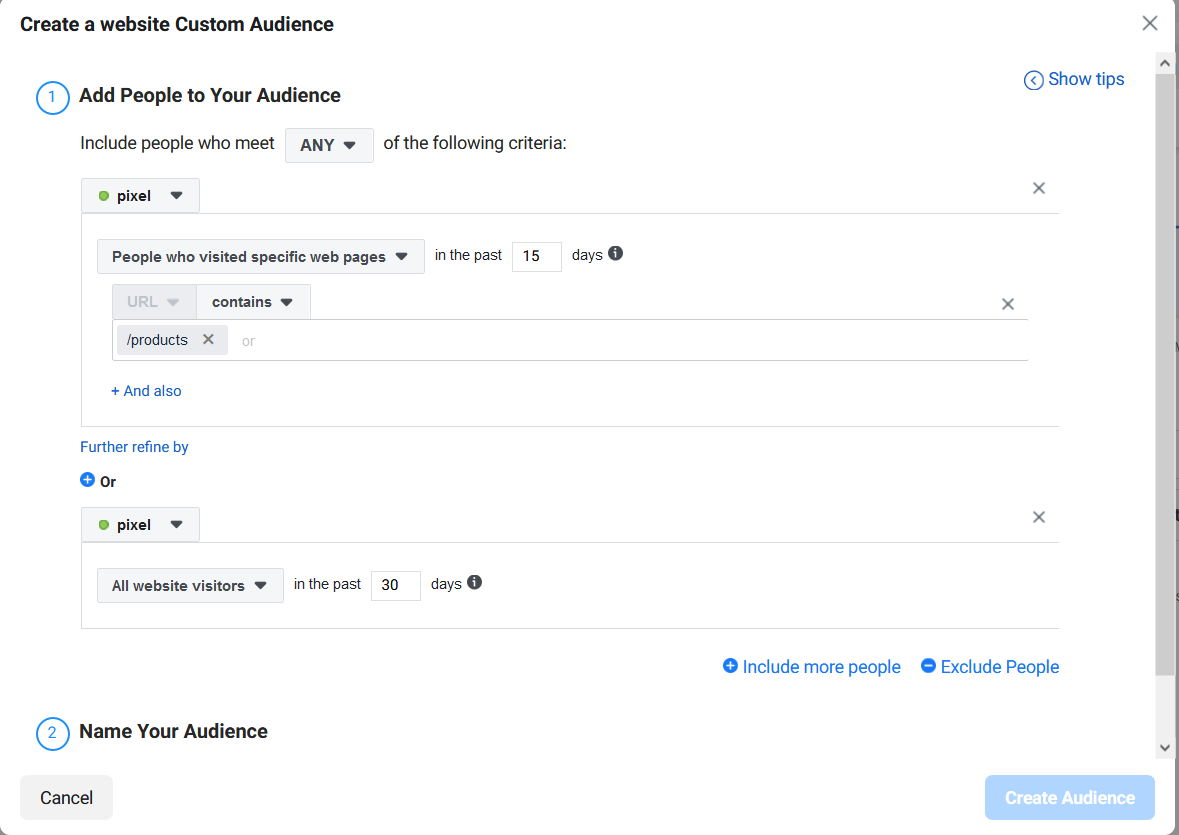
In addition, you can in seconds create a Lookalike audience based on characteristics of best customers according to your pixel’s data. This small piece of code actually lets you optimize ads, build more refined audiences for future ads, and retarget people who have taken specific actions on your website.